Create User in Customer Portal
For the instructions concerning the DNS API it is necessary to create an own DNS API user first.
On this site you learn how you can do it!
- Login to our customer portal cp.servercow.de.
- Click on
Add Contact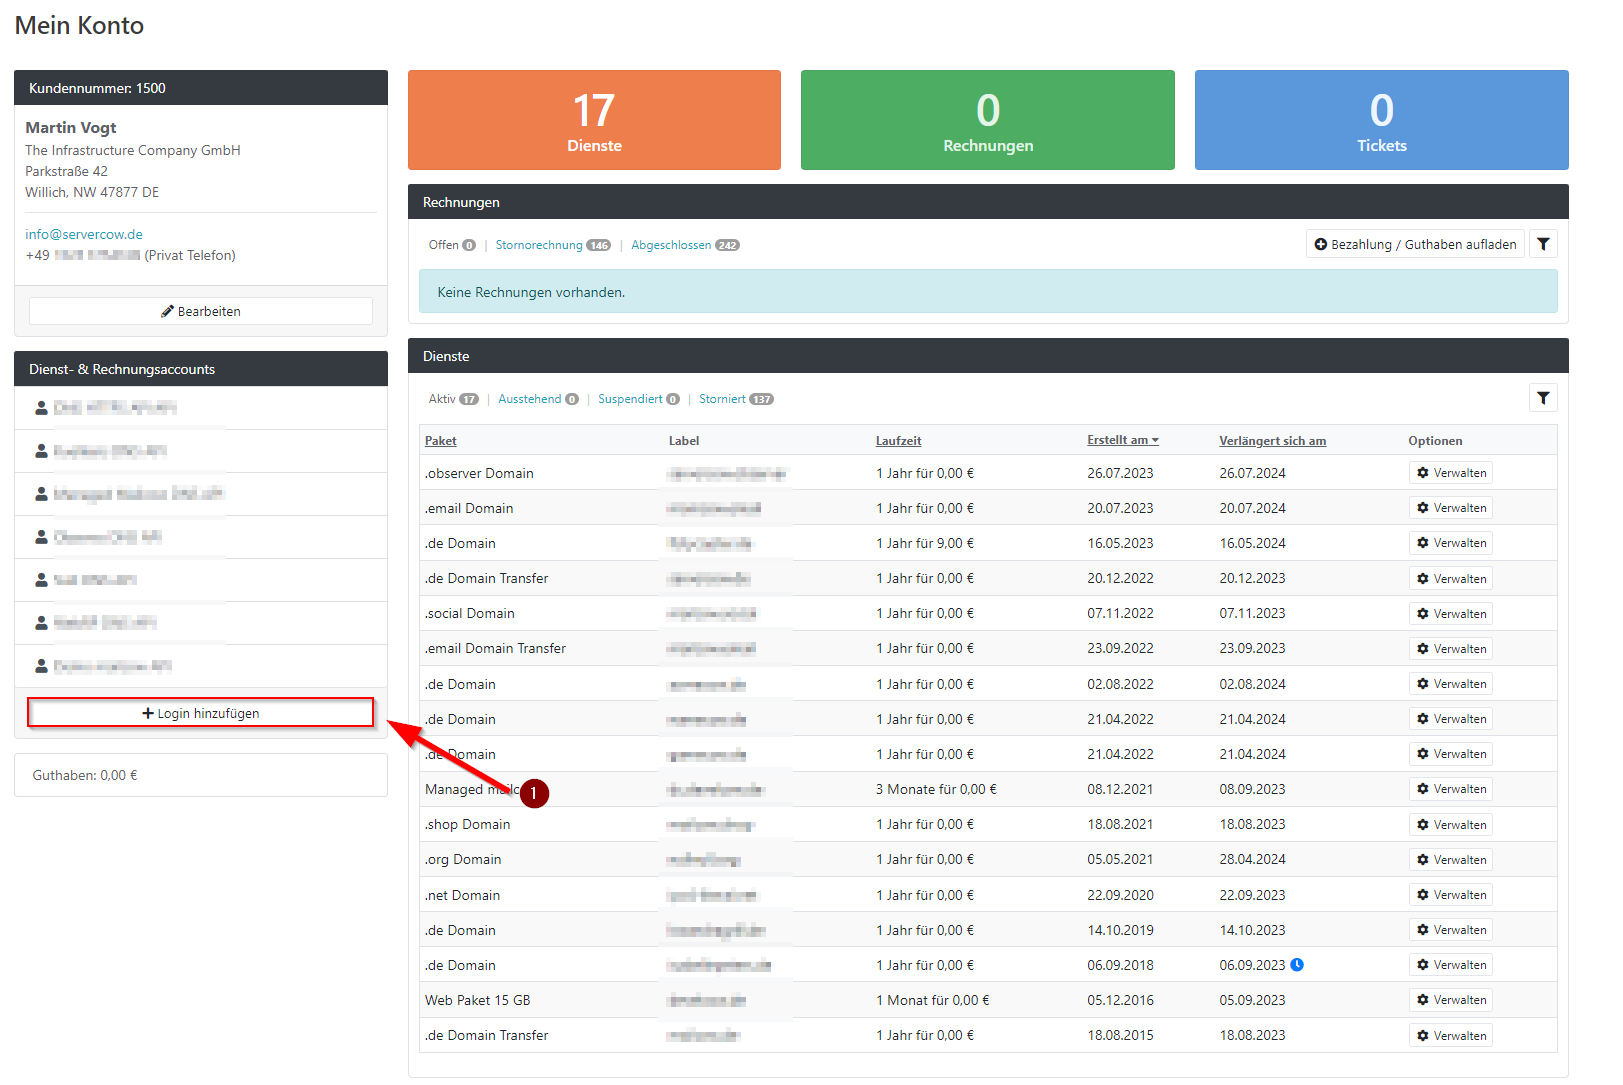
- In the window
Add Contactselect the second tab (Additional Settings). Then select theDNS APIContact Type in the dropdown and click on theContact Informationtab.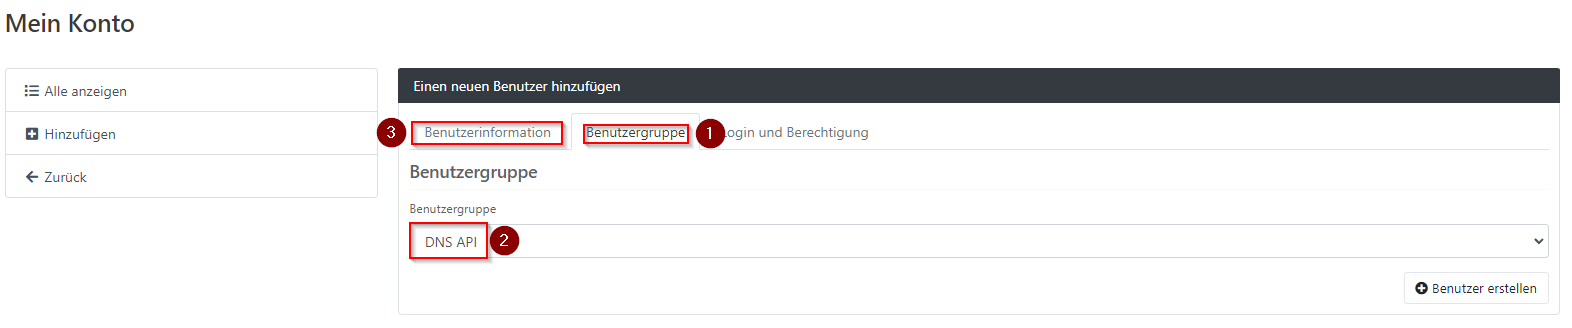
- In the tab
Contact Informationprovide the required details (unfortunately, address information must also be provided, although the user is only allowed to use the API).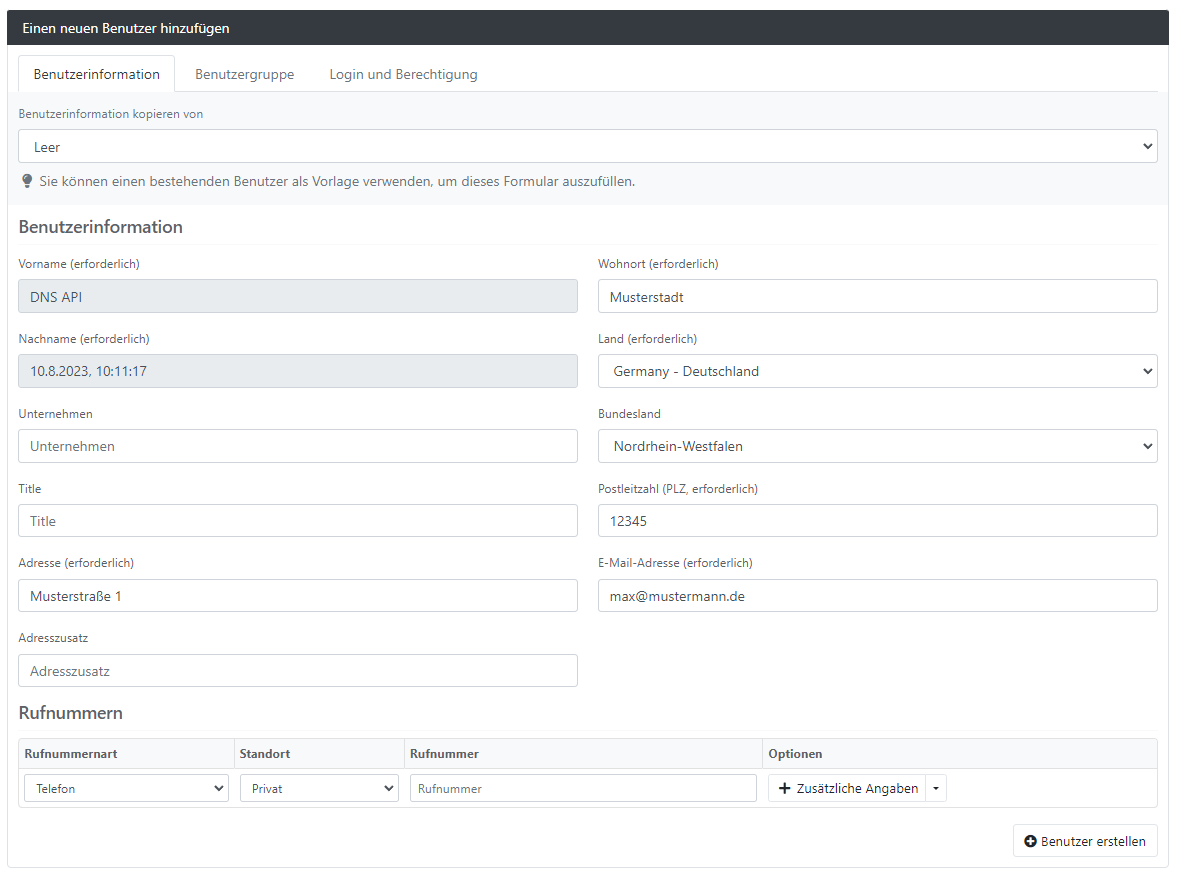
-
Switch to the
Authenticationtab and check the boxEnable Login. Now you have the possibility to set login credentials here. By default, the email you entered earlier will be selected as the username. However, we recommend using a name without @ characters (e.g.dnsapi_johndoeordnsapi_cn1500) 1500 is the customer number in this example account.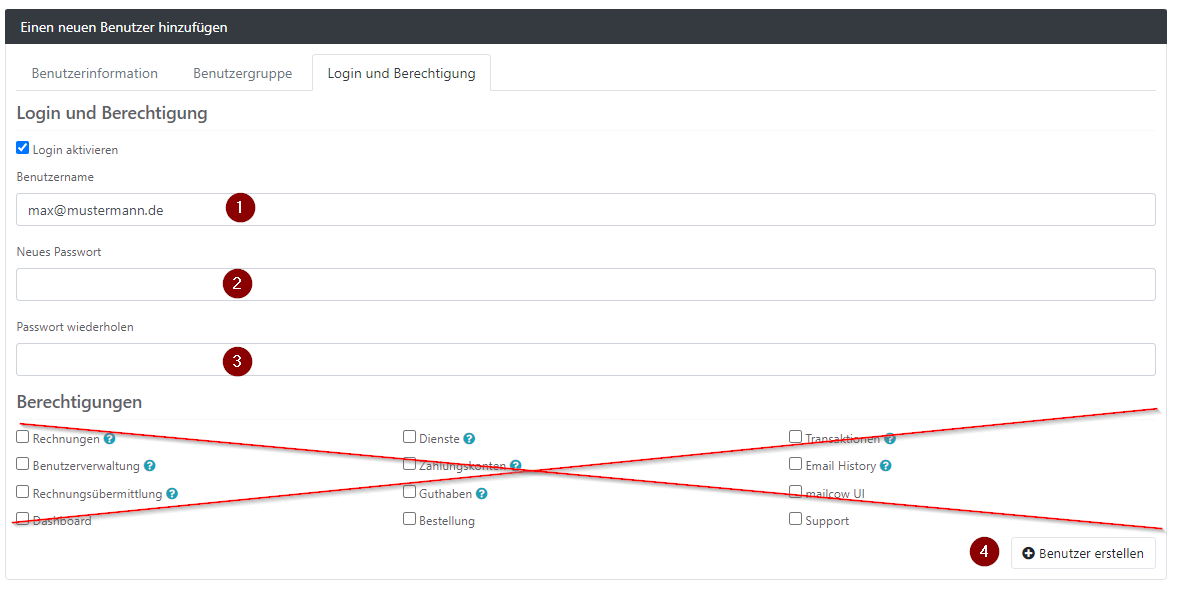
-
Save contact.
Once you have followed all the steps, the new DNS API login will appear in the list of Contacts. By default, these are named with the date of creation.
As soon as you see the user there you can use it for the DNS API or DynDNS instructions!