Configuration for FRITZ!Box (Router)
Notice
The Images used in this page are reused from the Original (German) version and will change in the near future.
Important
To use DynDNS a DNS API user MUST exist. To do that follow the guide Create User in Customer Portal!
For all domain customers we offer a DynDNS service which communicates with the Servercow nameservers via the Servercow DNS API.
In the following article you will learn how to connect your FRITZ!Box with the DynDNS API of Servercow to use the DynDNS service.
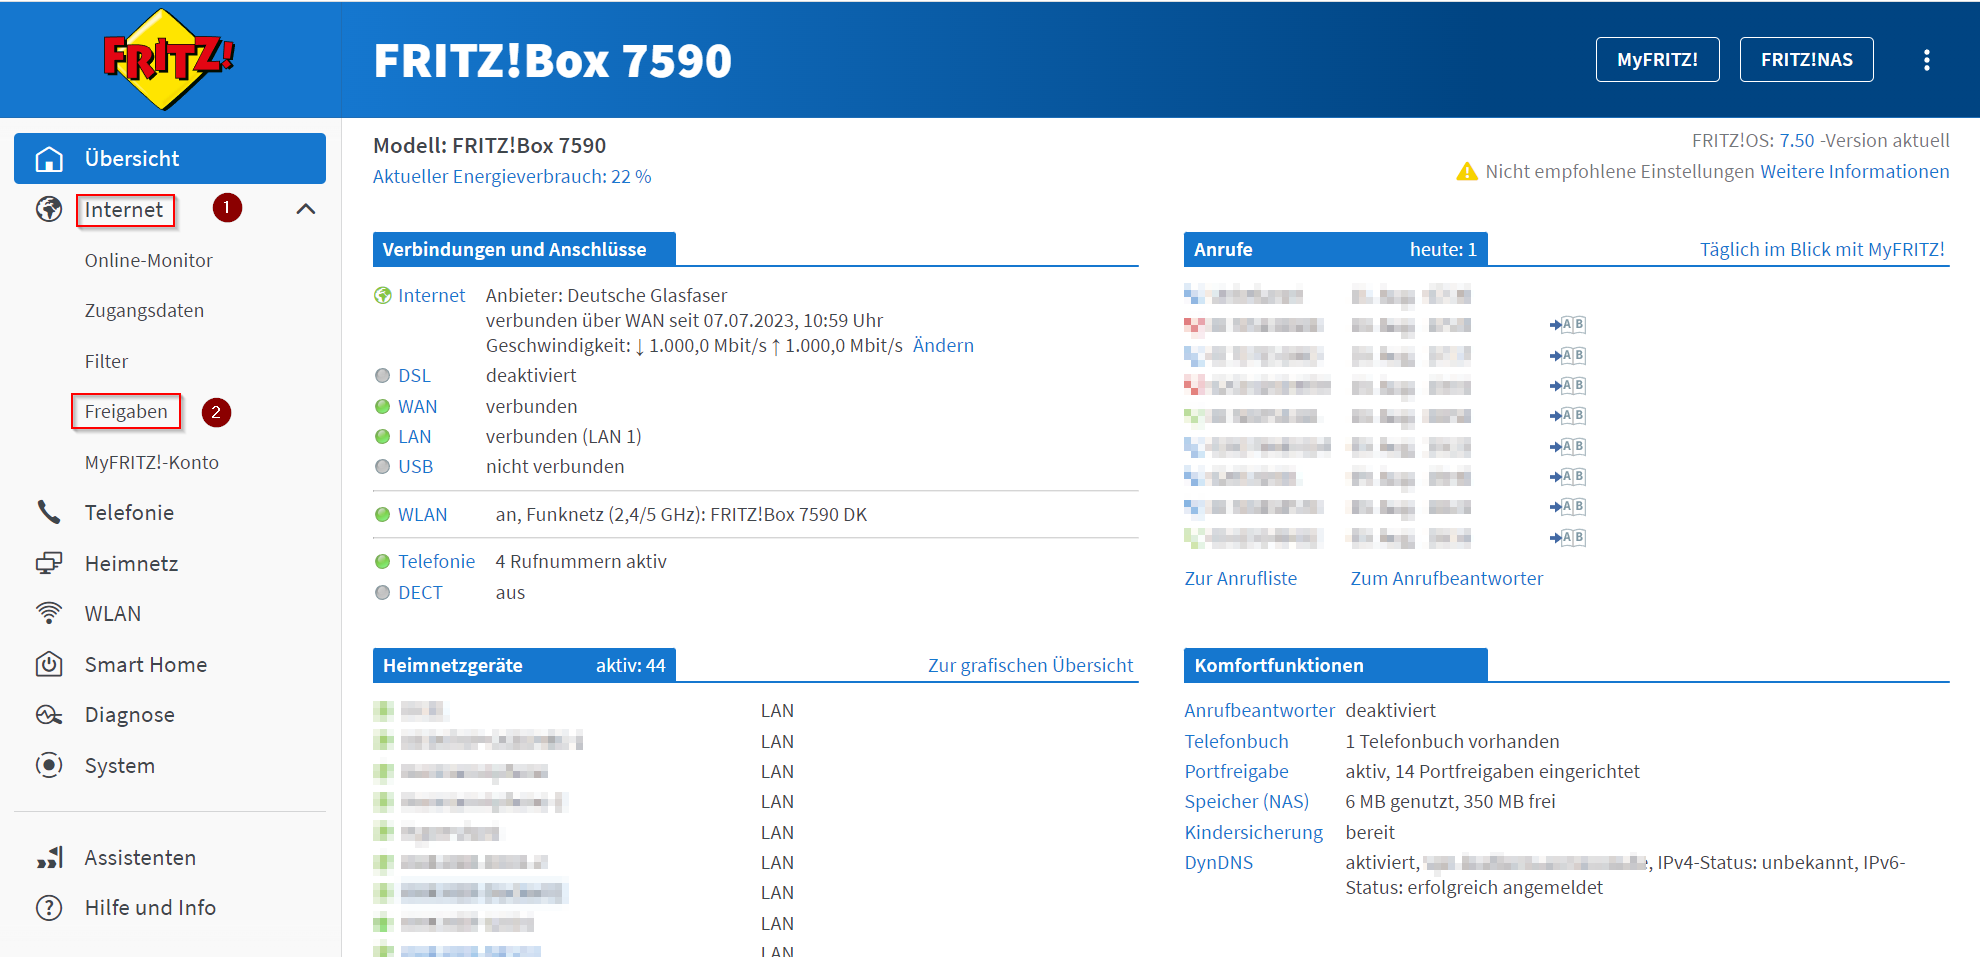
- Open your FRITZ!Box in the browser and log in (default via
fritz.boxor192.168.178.1). - Log in with your FRITZ!Box access data.
- Switch to the Internet tab --> Permit Access.
-
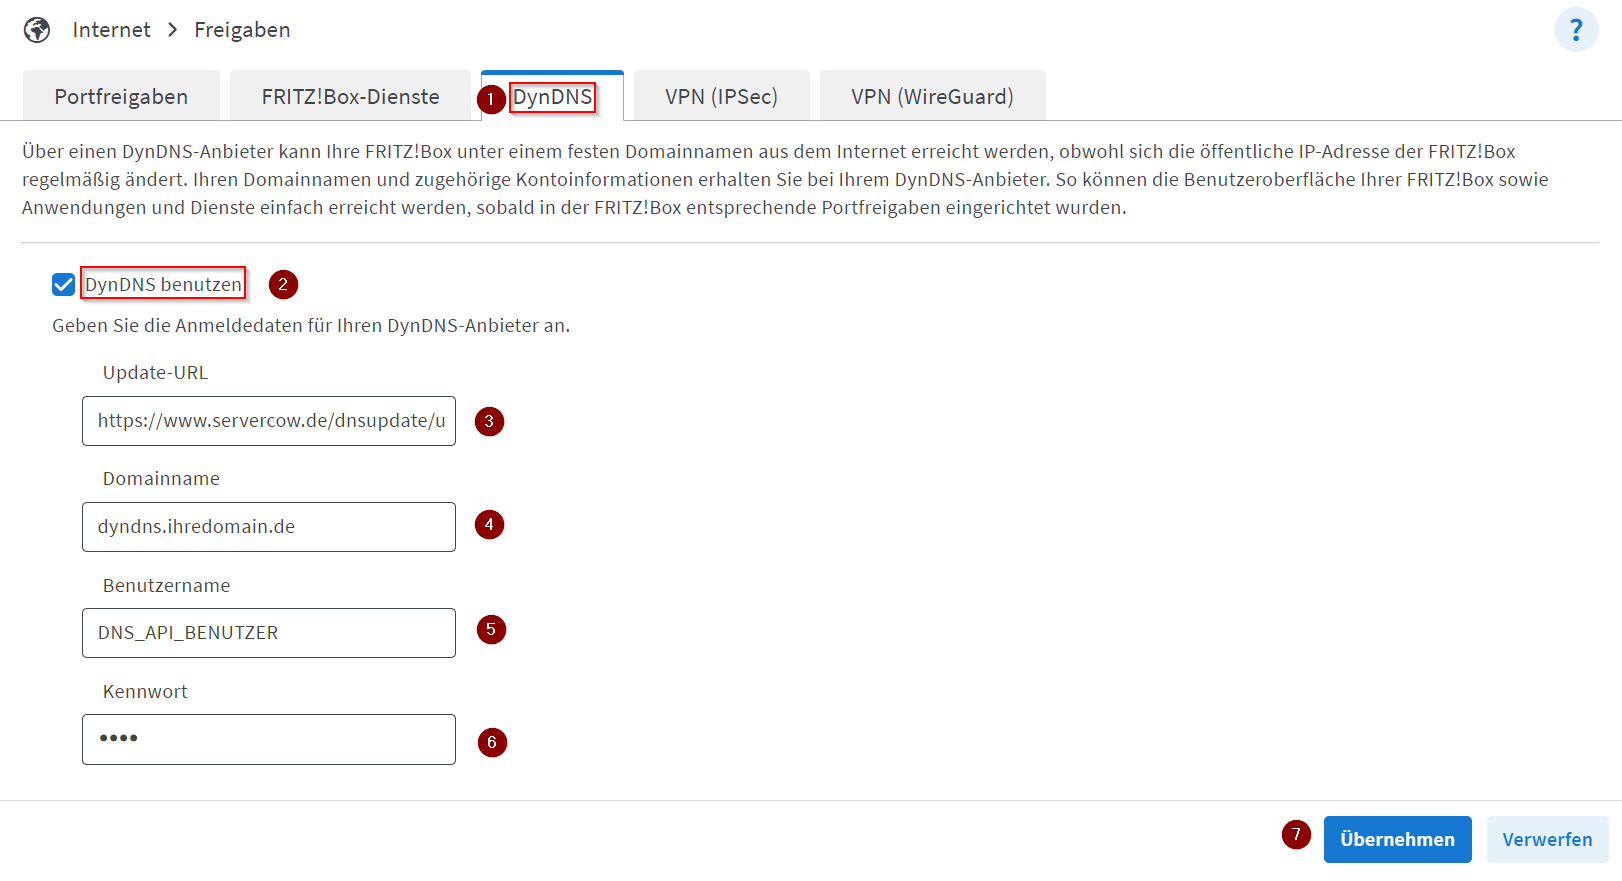
In the menu Permit Access select the tab DynDNS. Now activate the checkbox at
Use DynDNSPlease enter the following into the fields:DynDNS Options Content Update URL https://www.servercow.de/dnsupdate/update.php?username=<username>&pass=<pass>&hostname=<domain>&ipaddr=<ipaddr>&ip6addr=<ip6addr>Domain name Your subdomain/domain which should be updated via DynDNS (e.g. dyndns.yourdomain.com)Username Your DNS API user Password Your DNS API user password DynDNS Options Content Update URL https://www.servercow.de/dnsupdate/update.php?username=<username>&pass=<pass>&hostname=<domain>&ipaddr=<ipaddr>Domain name Your subdomain/domain which should be updated via DynDNS (e.g. dyndns.yourdomain.com)Username Your DNS API user Password Your DNS API user password DynDNS Options Content Update URL https://www.servercow.de/dnsupdate/update.php?username=<username>&pass=<pass>&hostname=<domain>&ip6addr=<ip6addr>Domain name Your subdomain/domain which should be updated via DynDNS (e.g. dyndns.yourdomain.com)Username Your DNS API user Password Your DNS API user password Success
Once everything is filled in, it should look something like this:
-
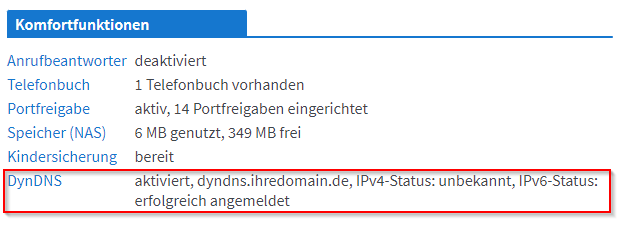
Save now. And you should see the following message on the FRITZ!Box start page (buttom right):
Notice
This example photo was taken with the update URL from the case
IPv6 only, therefore the IPv4 status is unknown and only the IPv6 status is registered.