Configuration for OPNsense (Firewall)
Important
To use DynDNS a DNS API user MUST exist. To do that follow the guide Create User in Customer Portal!
For all domain customers we offer a DynDNS service which communicates with the Servercow nameservers via the Servercow DNS API.
In the following article you will learn how to connect your OPNsense firewall to the DynDNS API of Servercow using the os-ddclient plugin.
Preparation
To use this integration you have to install the DDClient in the OPNsense first:
- Log in to your firewall.
- Go to the menu item:
SystemFirmwarePluginsand look for the plugin os-ddclient. Once you have found it, click on the small + icon.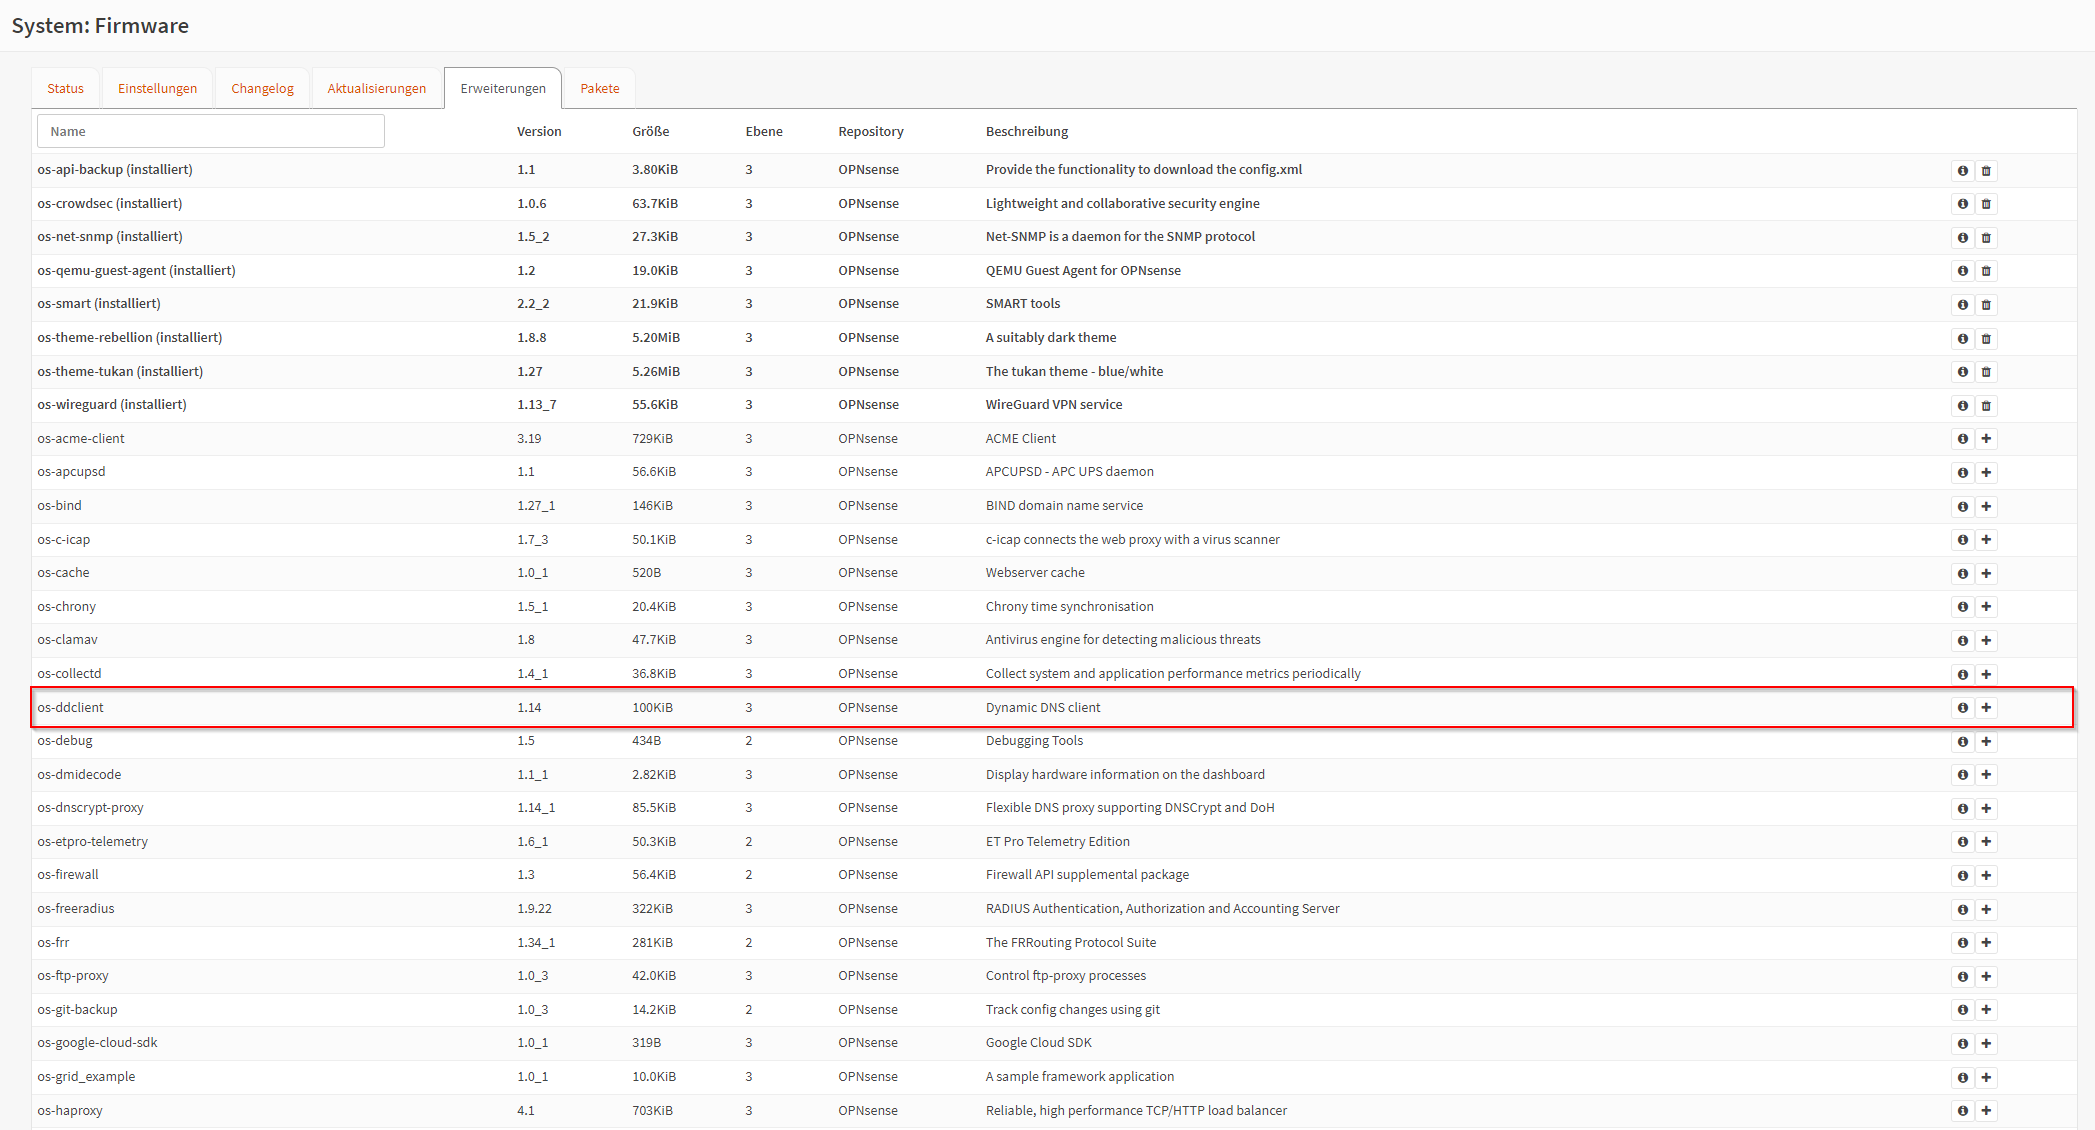
- Reload the page with a press on
F5. - Switch to
ServicesDynamic DNSSettingsin the menu. -
Click on the tab
General settingsand activate the check mark atadvanced mode. Activate the check markAllow IPv6if your OPNsense firewall also has a public IPv6 address.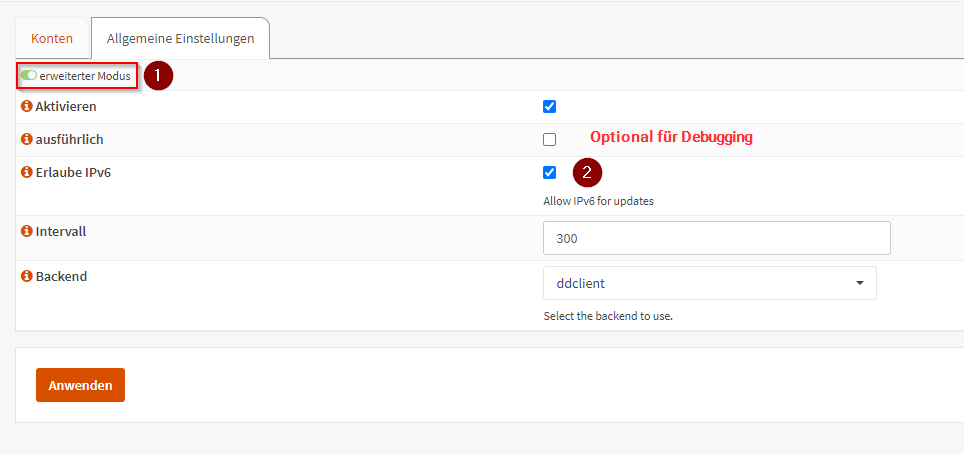
Debugging
For better debugging, you can additionally check
Verboseto get more detailed messages from the DynDNS plugin. -
Save your changes by clicking on
Apply.
Configuration
- In the menu, switch to the DynDNS settings (usually under:
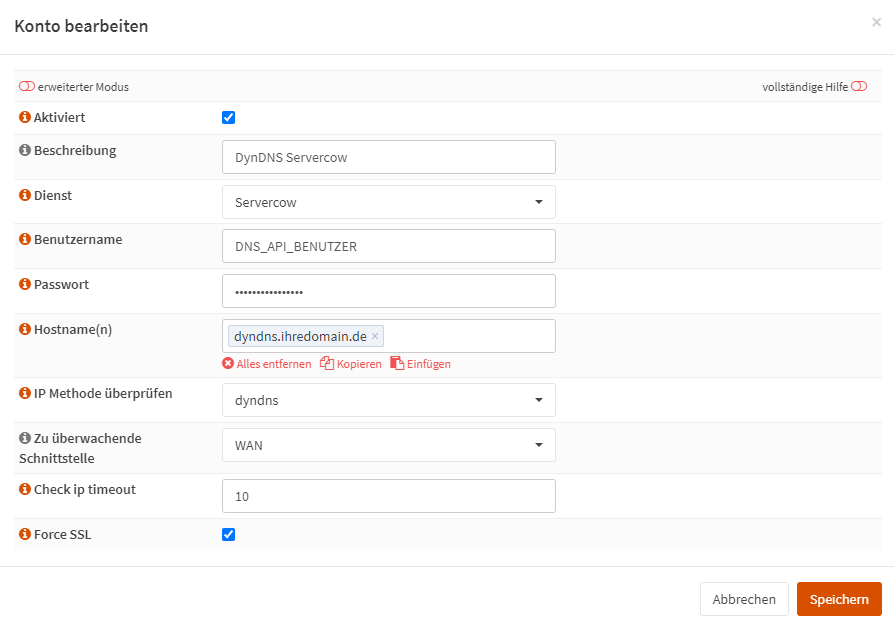
ServicesDynamic DNSSettings). - Select the tab
Accountsand click on the small +. -
Now enter the following in the fields:
OPNsense DynDNS Field Content to be entered Description Name of your choice (e.g. DDNS Servercow dyndns.yourdomain.com)Service Servercow Usaename Your DNS API User Password Your DNS API Password Hostname(s) at least 1 Subdomain, which subdomain/domain to update via DynDNS (e.g. dyndns.yourdomain.com)Check ip method dyndnsInterface to monitor The interface that owns the Dynamic IP address. Usually WANCheck ip timeout 10 Force SSL 
Example configuration
-
Save your changes.
Now your OPNsense firewall should set its current IP address in DNS every 5 minutes.
Info
If the IP address has not changed, there is no change in the DNS!